Repairing, Restoring, or Reinstalling Mac OS X Software
If you have a problem with your Mac software or hardware, Mac OS X provides repair
and restore utilities that may eliminate problems and can even restore your software
to its original factory settings. You can access these utilities from the Mac OS X Utilities
application, even if your computer isn’t starting up correctly.
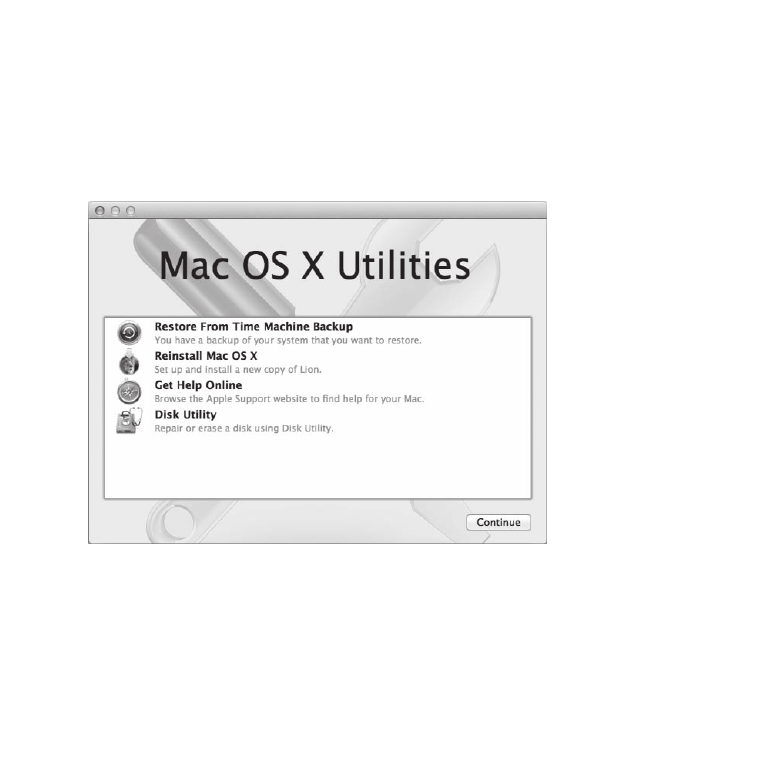
Use the Mac OS X Utilities application to:
Â
Restore your software and data from a Time Machine backup.
Â
Reinstall Mac OS X Lion and Apple applications.
Â
Repair your computer’s disk using Disk Utility.

53
Chapter 4
Problem, Meet Solution
Â
Restore your computer to its factory settings by erasing its disk and reinstalling
Mac OS X Lion and your Apple applications.
If your computer detects a problem, it opens the Mac OS X Utilities application
automatically. You can also open it manually by restarting your computer.
To open the Mac OS X Utilities application:
m
Restart your computer while holding down the Command key (x) and R key.
Important:
If the Mac OS X Utilities application doesn’t appear after restarting, hold
down Command (x)-Option-R and restart the computer to access the Mac OS X
Utilities software from the Internet. Your computer must be connected to a network
that has access to the Internet.
Some utilities in the Mac OS X Utilities pane require access to the Internet and the Mac
App Store. You may need to make sure your computer is connected to the Internet via
your Ethernet or Wi-Fi network.
To connect via a Wi-Fi network:
1
Choose a network from the Wi-Fi status menu in the upper-right corner of the screen.
2
If necessary, type the network password.
To join a closed network, choose Join Other Network. Enter the network’s name and
password.

54
Chapter 4
Problem, Meet Solution
Repairing a Disk with Disk Utility
If you have a problem with your computer, or if you start your computer and see the
Mac OS X Utilities pane, you may need to repair your computer’s disk.
1
Select Disk Utility in the Mac OS X Utilities pane and click Continue.
2
Select the disk or partition in the list on the left, and then click the First Aid tab.
3
Click Repair Disk.
If Disk Utility can’t repair the disk, back up as much of your information as possible,
and then follow the instructions in “Reinstalling Mac OS X and Apple Applications” on
page 55.
For information about Disk Utility and its options, see Help Center, or open Disk Utility
(in the Utilities folder in Lauchpad) and choose Help > Disk Utility Help.
Restoring Information Using a Time Machine Backup
If you previously created a Time Machine backup, use the Restore utility to restore
everything on your computer to its previous state.
Use your Time Machine backup only to restore information to the computer that was
the source of the backup. If you want to transfer information to a new computer, use
Migration Assistant.
1
If your backup is on a Time Capsule, make sure your Mac mini is connected to an Ethernet
or Wi-Fi network. (To connect to a Wi-Fi network, follow the instructions on page 53.)
2
In the Mac OS X Utilities pane, select Restore From Time Machine Backup and click
Continue.
3
Select the disk that contains the Time Machine backup, and then follow the onscreen
instructions.

55
Chapter 4
Problem, Meet Solution
Reinstalling Mac OS X and Apple Applications
Under some circumstances, you may need to reinstall Mac OS X and Apple applications.
You can reinstall while keeping your files and user settings intact.
Important:
The Mac OS X Utilities application also reinstalls and restores Mac OS X Lion
Server software, if you have it installed on your Mac mini.
1
Make sure the Mac mini is connected to the Internet via an Ethernet or Wi-Fi network.
(To connect to a Wi-Fi network, follow the instructions on page 53.)
2
In the Mac OS X Utilities pane, select Reinstall Mac OS X and click Continue.
3
When you’re asked to select a disk, select your current Mac OS X disk (in most cases,
it’s the only one available).
4
To install optional software, click Customize.
5
Click Install.
You can install Mac OS X without erasing the disk, which saves your existing files
and settings, or you can erase the disk first, which erases all your data and leaves the
computer ready for you to reinstall Mac OS X and Apple applications.
After reinstalling Mac OS X, you can then go to the Mac App Store and re-download
the applications that came with your Mac mini and other apps you purchased from the
Mac App Store.
Important:
Apple recommends that you back up the data on the disk before restoring
software. Apple is not responsible for any lost data.

56
Chapter 4
Problem, Meet Solution
Restoring Your Computer to Its Factory Settings
When you restore your computer to its factory settings, everything on your computer
(your user accounts, network settings, and all of your files and folders) is deleted. Before
you restore, back up any files you want to keep by copying them to another disk.
Write down your network settings from Network preferences to make it easier to get
connected again after reinstalling Mac OS X.
1
Make sure you’re connected to the Internet via an Ethernet or Wi-Fi network.
(To connect to a Wi-Fi network, follow the instructions on page 53.)
2
In the Mac OS X Utilities pane, select Disk Utility and click Continue.
3
Select the disk in the list on the left, and then click the Erase tab.
4
Choose Mac OS Extended (Journaled) from the Format pop-up menu, type a name for
the disk, and then click Erase.
5
After the disk is erased, choose Disk Utility > Quit Disk Utility.
6
In the Mac OS X Utilities pane, select Reinstall Mac OS X and click Continue.
7
To reinstall Mac OS X and Apple applications, follow the instructions in the Mac OS X
Installer.
After restoring Mac OS X and Apple applications, you can selectively restore your other
data and applications from a Time Machine backup.

57
Chapter 4
Problem, Meet Solution